Why You’ll Love These Homemade Chocolate Sandwich Cookies
- Rich and Chocolatey Flavor: The cookies are packed with intense cocoa flavor, making them a chocolate lover’s dream.
- Chewy Texture: The cookies bake up soft and chewy with a slight fudginess that makes every bite irresistible.
- Decadent Vanilla Filling: The vanilla cream filling is smooth, sweet, and the perfect contrast to the rich chocolate cookies.
- Versatile and Customizable: This recipe allows for creative variations, from the type of chocolate chips used to different flavor fillings.
- Perfect for Any Occasion: Whether it’s a birthday, holiday, or just a regular day when you want something special, these cookies are sure to satisfy any sweet tooth.
The Perfect Balance of Chocolate and Vanilla
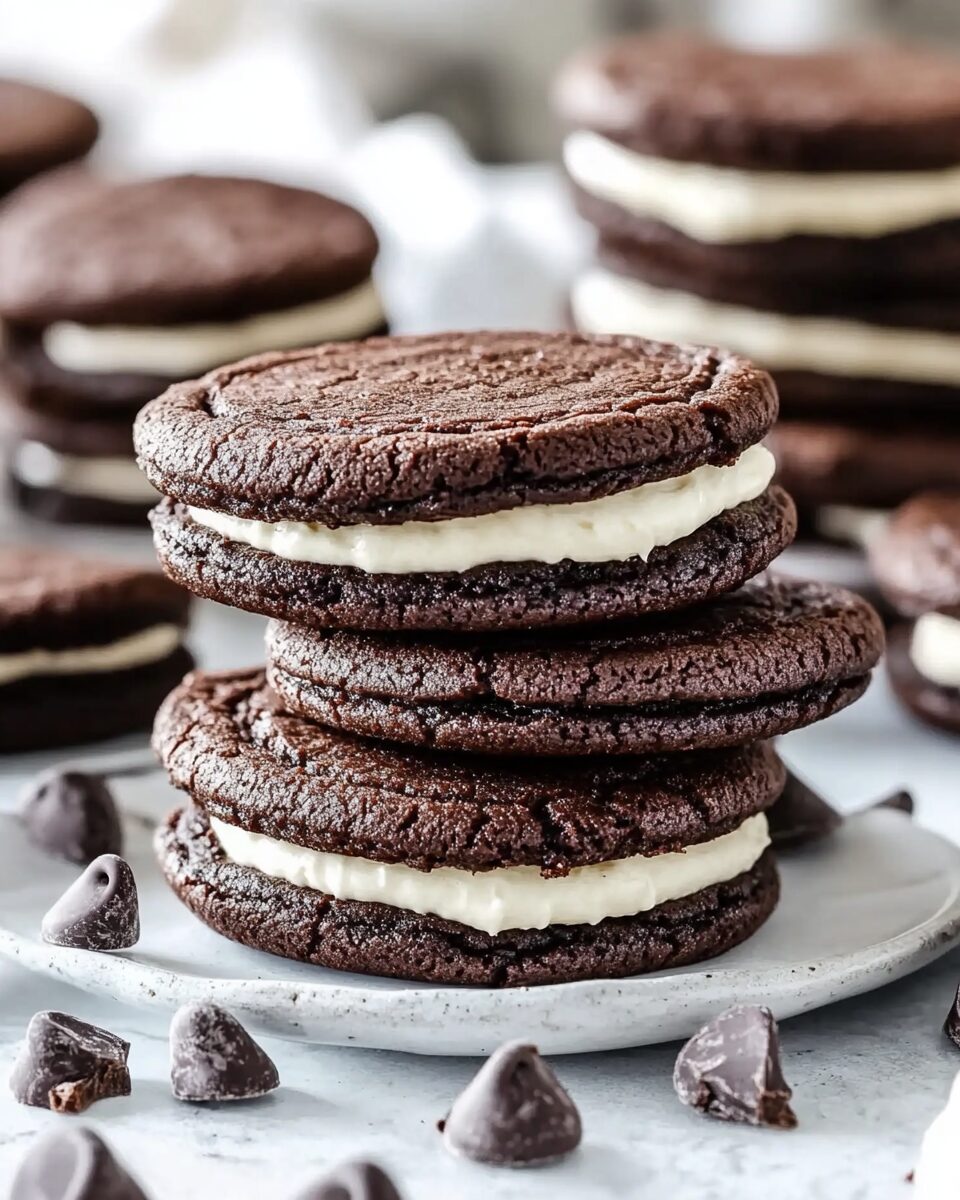
What makes these chocolate sandwich cookies so special is the balance between the rich chocolate cookies and the creamy vanilla filling. The chocolate cookies are soft and slightly chewy with a deep cocoa flavor, while the vanilla cream filling adds a light, sweet contrast. This combination of flavors and textures creates the perfect bite—not too heavy, but still indulgent.
The cookies themselves are made with unsweetened cocoa powder and a blend of granulated sugar and brown sugar, which gives them that soft, chewy texture and a subtle hint of caramel flavor. The addition of mini chocolate chips inside the cookies takes them to the next level, creating pockets of melted chocolate that enhance the overall richness.
Making the Perfect Chocolate Cookies
To achieve the perfect texture and flavor in your chocolate cookies, the quality of ingredients and the mixing process are key:
- Butter: Using room temperature unsalted butter ensures that it creams well with the sugars, creating a smooth, light dough. The butter is the base for the cookie dough and plays a crucial role in the texture.
- Sugar: The combination of granulated sugar and light brown sugar adds both sweetness and moisture to the cookies, contributing to their soft texture. The brown sugar also adds a subtle caramel flavor, complementing the chocolate.
- Eggs and Egg Yolks: The eggs add structure, while the extra egg yolks contribute to the richness and chewiness of the cookies.
- Flour and Cocoa Powder: All-purpose flour gives the cookies structure, while unsweetened cocoa powder provides the deep chocolate flavor. Be sure to sift the cocoa powder and flour together to avoid any clumps.
- Baking Powder and Baking Soda: These leavening agents help the cookies rise and spread, giving them that ideal soft and chewy texture.
- Chocolate Chips: The addition of mini chocolate chips and optionally semi-sweet chocolate chips on top creates extra pockets of chocolate that melt into the cookie, making every bite even more indulgent.
The Importance of Chilling the Cookie Dough
While it might be tempting to bake the cookies immediately after preparing the dough, chilling the dough is a critical step in achieving the perfect texture. Chilling the dough for at least 3 hours (or overnight) helps the cookies hold their shape during baking, preventing them from spreading too much and resulting in thick, chewy cookies. The chill time also allows the flavors to develop, making the cookies even more flavorful.
The Creamy Vanilla Filling: A Simple Yet Essential Component
The vanilla cream filling is what makes these chocolate sandwich cookies truly special. It’s smooth, sweet, and just the right texture to complement the chewy chocolate cookies. Here’s what makes the filling stand out:
- Butter: Using unsalted butter as the base gives the filling a rich, creamy consistency.
- Powdered Sugar: Powdered sugar, or confectioners’ sugar, is key to achieving the smooth, silky texture in the filling. Unlike granulated sugar, powdered sugar dissolves easily, giving the cream a soft and spreadable consistency.
- Vanilla Extract: Vanilla extract adds a sweet, aromatic note that pairs perfectly with the chocolate cookies.
- Cream or Milk: A little bit of heavy cream or milk helps to thin the filling to the right consistency, making it easy to spread between the cookies. Adjust the amount of liquid depending on how thick or thin you prefer your filling.
Assembling the Sandwich Cookies
Once your cookies have cooled and your filling is ready, it’s time to assemble the sandwich cookies. Here are some tips for perfect assembly:
- Even Spacing: Be sure to match the cookies up in pairs of similar size to ensure even filling distribution.
- Generous Filling: Don’t skimp on the filling! Use about 1-2 tablespoons of cream filling per sandwich, ensuring that the cookies are generously filled and the cream oozes out just a little.
- Press Gently: When putting the two cookies together, press down gently to spread the filling evenly and make sure the sandwich stays intact.
- Storage: Once assembled, store the cookies in an airtight container at room temperature for up to 5 days or in the fridge for a slightly firmer filling.
Serving Suggestions
These homemade chocolate sandwich cookies are delicious on their own, but you can elevate the experience by pairing them with some simple sides:
- A Glass of Milk: These cookies are perfectly paired with a cold glass of milk, which complements the sweetness of the filling and the richness of the chocolate cookies.
- Coffee or Tea: Enjoy these cookies with a warm beverage like coffee, espresso, or a cup of black tea for a cozy afternoon treat.
- Ice Cream Sandwiches: For a more indulgent dessert, make ice cream sandwiches by adding a scoop of your favorite ice cream between the cookies.
- Fruit: Serve with fresh fruit, like berries or citrus slices, to balance the richness of the cookies with a touch of freshness.
Storing and Freezing Your Cookies
If you have leftover cookies, they store beautifully for several days. Here’s how to keep them fresh:
- Room Temperature: Store the cookies in an airtight container at room temperature for up to 5 days.
- Refrigeration: If you prefer a firmer filling, you can store the cookies in the fridge for up to a week.
- Freezing: To extend the shelf life, you can freeze the cookies. Place them in a freezer-safe container or zip-top bag and freeze for up to 3 months. When ready to eat, allow them to come to room temperature, or enjoy them chilled!
Why These Homemade Chocolate Sandwich Cookies Are a Must-Try
- Irresistible Flavor: The combination of rich chocolate cookies and creamy vanilla filling makes for a decadent and satisfying treat.
- Perfect Texture: The chewy, fudgy cookies paired with the smooth cream filling create a delightful contrast that makes every bite a joy.
- Customizable: The recipe allows for modifications, such as adding different types of chocolate chips or adjusting the filling flavors.
- Perfect for Any Occasion: Whether you’re celebrating a special event or simply craving a delicious homemade cookie, these sandwich cookies are a perfect choice.
Conclusion
These Homemade Chocolate Sandwich Cookies are the perfect combination of rich chocolate flavor, smooth vanilla cream, and chewy texture. They are easy to make, highly customizable, and ideal for any occasion. Whether you’re serving them at a party, gifting them to a friend, or enjoying them with a glass of milk on a cozy afternoon, these cookies are sure to impress.
Treat yourself and your loved ones to these indulgent sandwiches that are bound to become a new favorite dessert. Bake these cookies today, and enjoy the sweet, creamy, and chocolatey goodness that comes with every bite!