Why You’ll Love These Bunny-Themed Oreo Balls
There are plenty of reasons to fall in love with these adorable truffles:
- Easy and No-Bake: You don’t need an oven to make them, which makes the process quick and hassle-free.
- Perfect for Spring: Their pastel colors and bunny shape make them ideal for Easter and other spring celebrations.
- Fun for All Ages: Kids will love helping with the decorating, and adults will enjoy their nostalgic flavor.
- Customizable: While white chocolate creates a classic bunny look, you can switch it up with milk or dark chocolate for variety.
- Great for Gifting: Pack them in treat boxes or bags for a cute homemade gift idea.
Whether you’re looking for a fun family activity or a stunning dessert for a special occasion, these Oreo truffles check all the boxes!
The Magic Behind Oreo Truffles
Oreo truffles are a simple yet magical dessert that combines crushed chocolate sandwich cookies with softened cream cheese to create a rich, smooth, and flavorful filling. This mixture is then shaped into balls, chilled, and coated in a luscious chocolate shell.
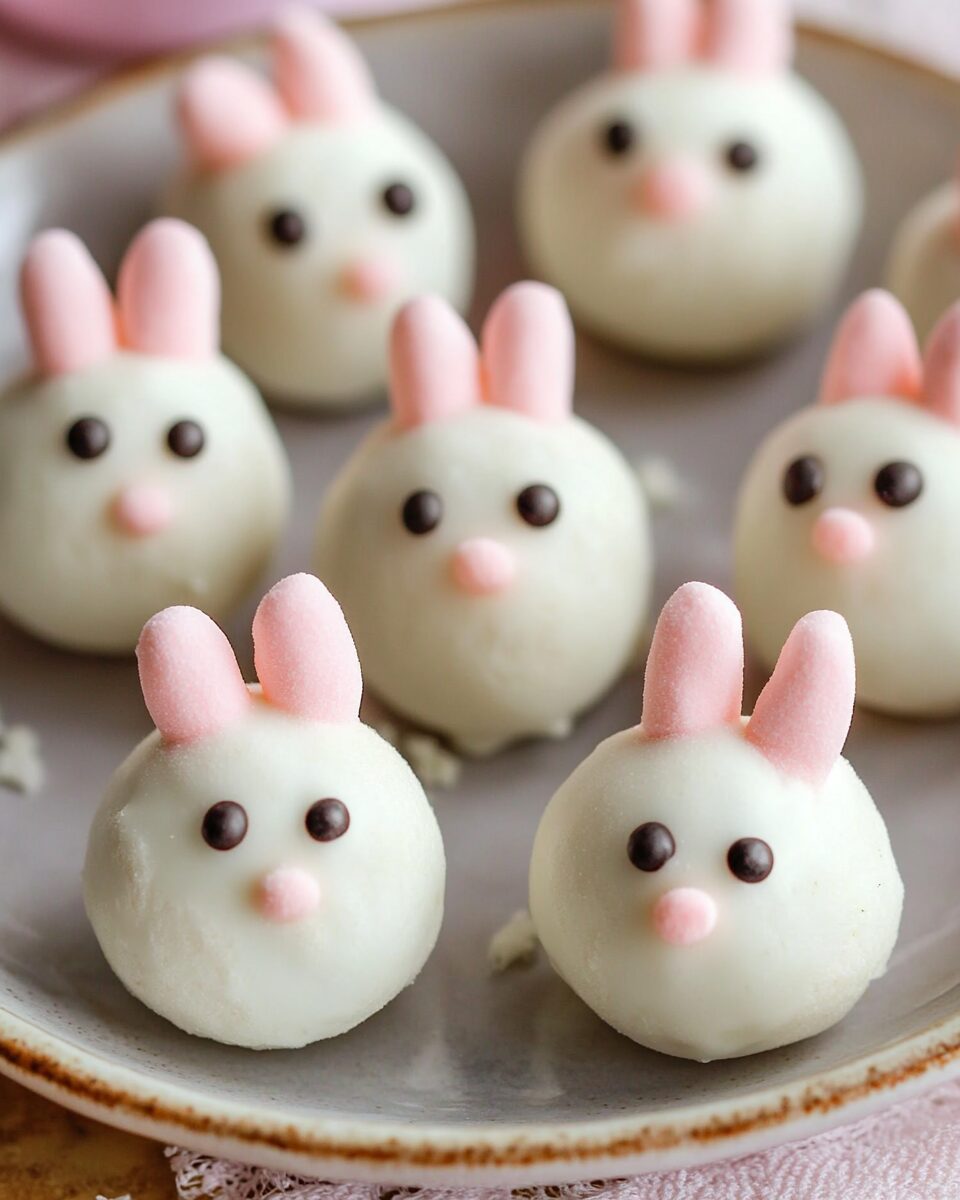
What makes these bunny Oreo balls extra special is the thoughtful decorating process. Using mini marshmallows, sanding sugar, and icing, each truffle is transformed into a cute and whimsical bunny shape, complete with ears, a fluffy tail, and tiny feet.
This attention to detail makes them a fantastic dessert for Easter baskets, holiday platters, or even as a fun school treat. Plus, they’re easy to transport and store, so you can make them ahead of time without any stress.
Tips for the Best Bunny-Themed Oreo Balls
To make sure your truffles turn out perfectly every time, follow these helpful tips:
1. Use a Food Processor for the Smoothest Mixture
The key to a perfectly smooth truffle filling is finely crushed Oreo cookies. Using a food processor ensures the cookies are ground into a fine, sand-like texture, which helps them blend seamlessly with the cream cheese. If you don’t have a food processor, you can crush the cookies with a rolling pin and a zip-top bag, but make sure there are no large chunks left.
2. Chill the Dough Before Dipping
After rolling the Oreo mixture into balls, chill them for at least an hour before dipping them in melted chocolate. This helps them firm up, making them easier to coat and less likely to fall apart. If you’re short on time, you can freeze them for 15–20 minutes instead.
3. Keep the Chocolate Smooth and Fluid
To achieve a silky, even coating, melt the white chocolate with a small amount of coconut oil. This keeps it fluid and prevents it from becoming too thick. If the chocolate starts to harden while you’re dipping, microwave it in short bursts until it’s smooth again.
4. Decorate Quickly Before the Chocolate Hardens
As soon as you dip each truffle in the melted chocolate, add the marshmallow decorations immediately. The coating hardens fast, so working quickly will ensure that all the decorations stick properly.
5. Use a Piping Bag for Neat Details
For precise facial features, use a piping bag with a fine tip to add the bunny’s nose, eyes, and whiskers. If you don’t have a piping bag, a toothpick or a small plastic bag with the tip cut off can work as a substitute.
Creative Variations to Try
While the classic bunny Oreo truffles are already adorable and delicious, there are plenty of ways to customize them:
1. Try Different Flavors
Instead of traditional chocolate Oreos, experiment with:
- Golden Oreos for a vanilla-flavored bunny.
- Mint Oreos for a refreshing twist.
- Peanut Butter Oreos for a nutty variation.
2. Use Colored Chocolate Coatings
While white chocolate gives these truffles their classic bunny appearance, you can have fun with different colors:
- Pastel pink or blue candy melts for a soft, spring-inspired look.
- Milk or dark chocolate for a richer, deeper flavor.
3. Add Sprinkles or Edible Glitter
A light dusting of edible glitter or colored sprinkles can add extra charm to your bunnies, making them even more festive.
Serving and Storing Bunny Oreo Balls
Once your bunny truffles are decorated and set, they’re ready to be enjoyed!
How to Serve:
- On a Dessert Platter: Arrange them on a pastel-colored tray for a festive Easter look.
- As Cupcake Toppers: Place one on top of a frosted cupcake for an extra-special treat.
- In Gift Bags: Wrap them in clear treat bags with a ribbon for party favors or Easter gifts.
How to Store:
- In the Refrigerator: Store in an airtight container for up to one week.
- In the Freezer: Freeze for up to three months. Let them thaw for a few minutes before eating.
Conclusion
Bunny-themed Oreo balls are more than just a dessert—they’re a delightful experience that brings joy, creativity, and delicious flavors together. Whether you’re making them for Easter, a birthday, or simply as a fun kitchen project, these adorable and easy-to-make treats are sure to be a hit.
Their creamy, chocolatey taste, combined with the whimsical bunny design, makes them perfect for sharing with family and friends. Plus, the customization possibilities are endless, so you can make them truly unique for every occasion.
So, the next time you’re looking for a no-bake treat that’s as fun to make as it is to eat, try whipping up a batch of bunny Oreo balls. They’re guaranteed to bring smiles to everyone who sees (and tastes) them!
Happy spring, and happy snacking!